Supporting the Gap Underneath Your Chest Freezer
If you are making a Chest Freezer Cold Plunge to use for your cold water immersion practice, one of the most overlooked best practices is to provide support underneath the chest freezer.
Why support your chest freezer?
Chest freezers are not designed to hold the weight of water- or people getting in and out of them. Even if you seal the seams of your chest freezer so that it will hold water, or apply waterproof coating (like Pond Shield) to the inside, these products can fail because of movement between the floor and walls, not only from the weight of the water, but from you stepping in and out and sitting inside. This can result in leaks, damage, and a dead chest freezer.
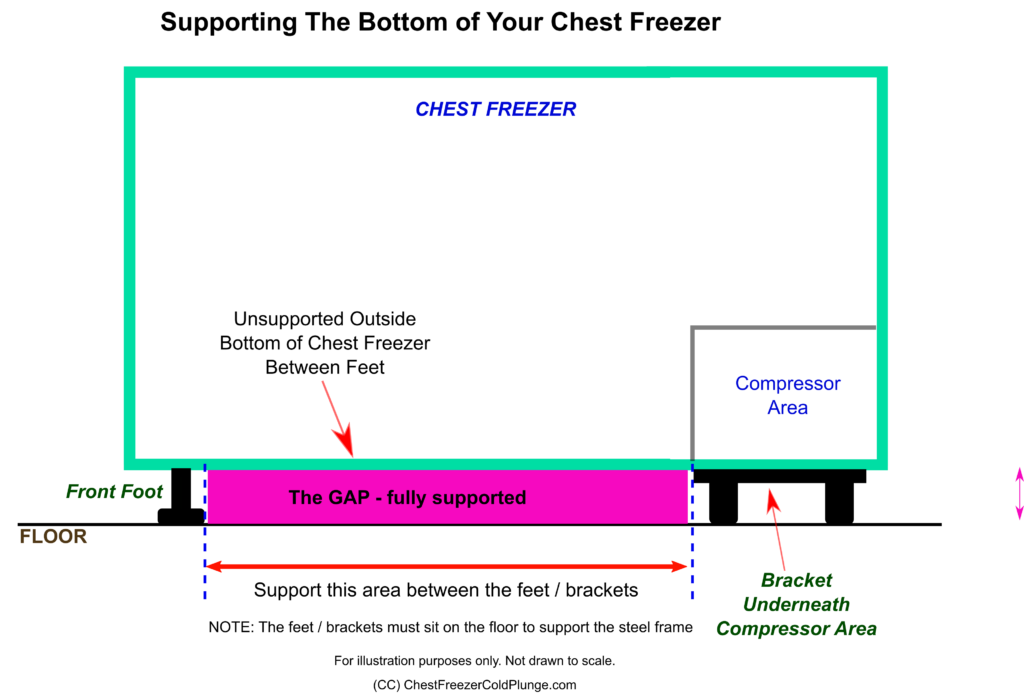
Placing the correct kind of support underneath your chest freezer will greatly reduce, if not completely prevent, that from being a problem. I use the term “gap” to refer to the open space between any built-in supports (feet, brackets, etc.) on that sit on the floor. The gap height is the distance between the floor and the bottom of the chest freezer.
Click here to see my post about sealing the seams.
Feet, Casters, Rails, and Brackets
Since 2017, I’ve had countless people tell me that their chest freezer sits flat on the floor. I’ve not yet once found this to be the case. Upon closer inspection, they discover feet, rails, and brackets underneath the chest freezer. I’m still waiting to see one that is completely flat.
In almost all cases, it is best to leave these feet and brackets in place because they are designed to support the steel frame inside the chest freezer. Removing them could create additional problems.
If your chest freezer came with casters (wheels) already installed and they did not also include smaller feet that could be used instead, I would leave them in place. If they come as an option, leave them off and use the attached (or enclosed) standard feet.
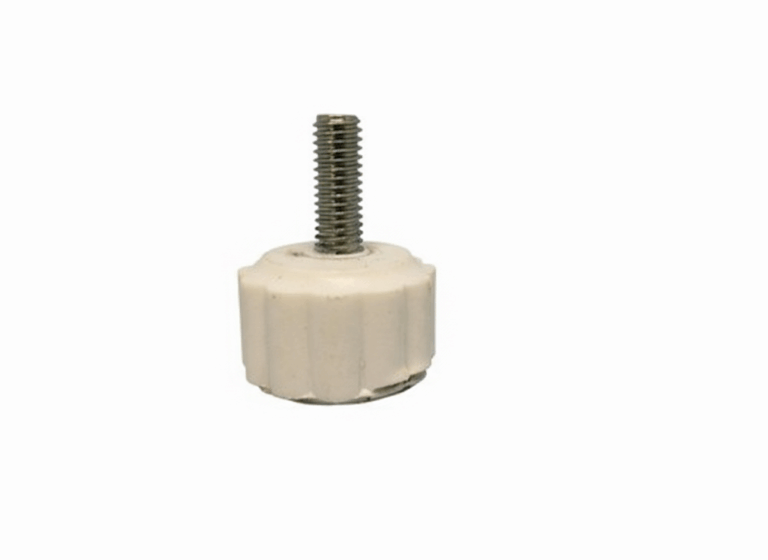
If needed, you can most likely find an adjustable foot that will fit your chest freezer. Search for the model number. The bolt on the foot will attach to the triangular-shaped bracket, which is technically called the “foot assembly.” When the adjustable foot is installed, there are usually only two of them, opposite of the compressor. The bracket underneath the compressor usually rests directly on the floor.
If you choose to leave the casters in place, the gap you need to fill in will be much taller and will require more material.
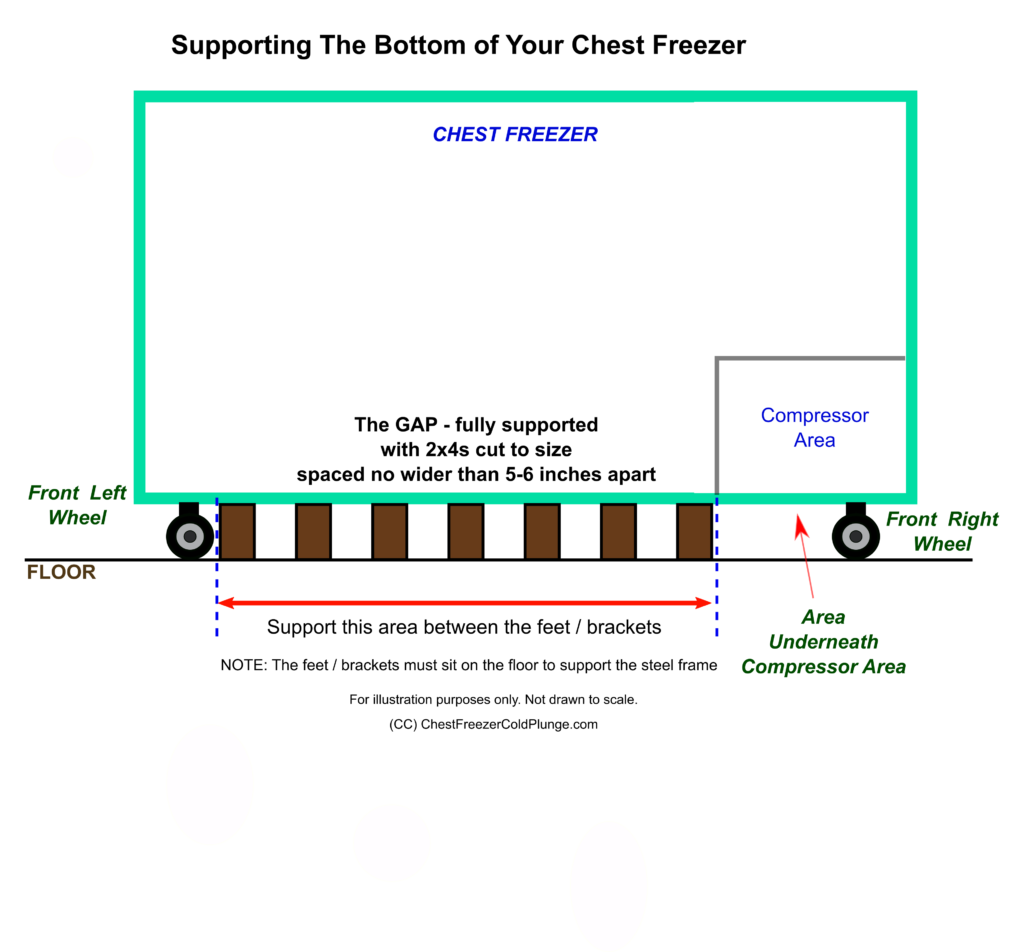
The Wide Unsupported Bottom
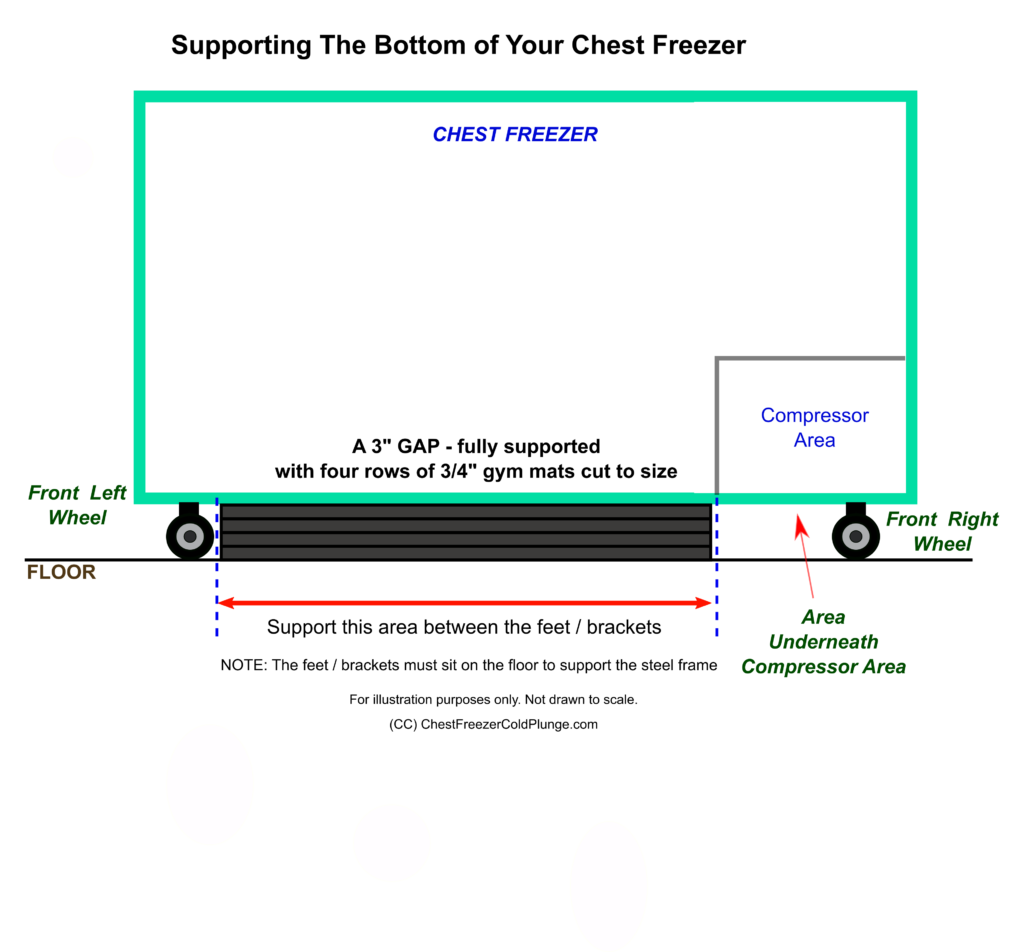
The part of the chest freezer that needs to be supported is between the brackets. Most chest freezers 15 cu ft / 400 L and under will have one continuous area between the bracket and the feet on the opposite, as pictured below.

Larger chest freezers may have a small support bracket centered between the compressor bracket and the feet.
Some chest freezers have rails that run across the entire front, left to right, and the back, left to right.
Bottoms Up! Photos for Reference
Here are a few examples of what you might find on the bottom of your chest freezer. There are too many possible variations to cover all options, but this should be enough to give you the general idea of what to do.
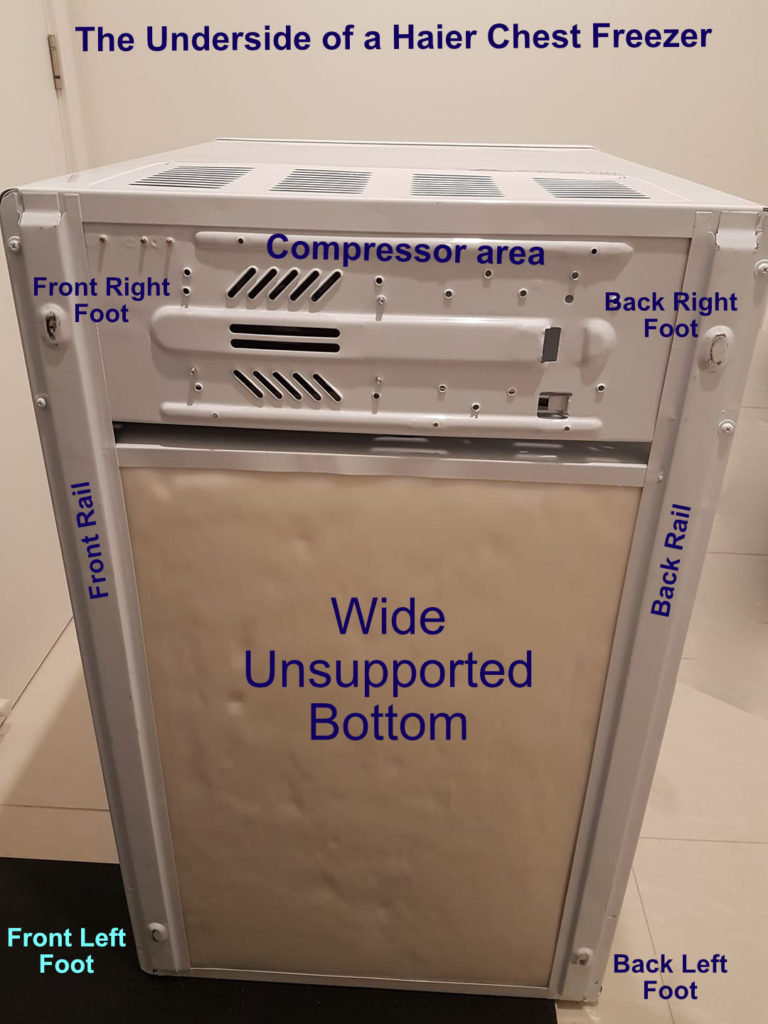
The photo below shows the bottom of a Hair chest freezer. It has a front and back rail with feet built into it. The area under the compressor also has rails/feet to support the chest freezer. Do not place any support underneath the compressor or vent holes.
The yellow foam insulation is exposed. Place supports underneath that yellow foam only. Let the feet and compressor area sit directly on the floor.
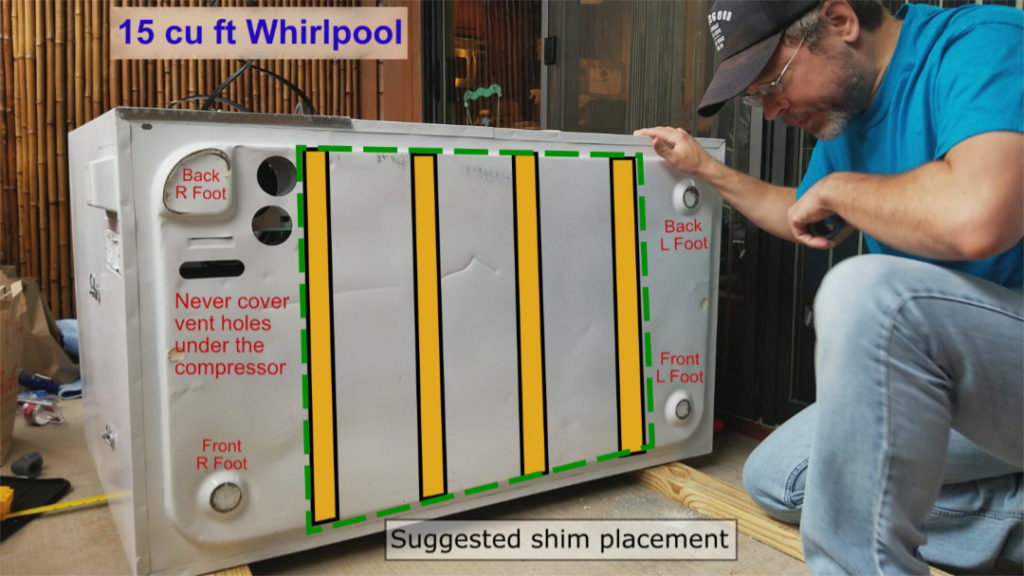
The feet on this Whirlpool chest freezer are extruded from a single piece of metal on the bottom. The green dashed lines represent the area to support. The yellow rectangles show how shims could be placed to support the bottom. I would recommend six now instead of four, when this picture was originally made. Do not place them more than 5 – 6 inches apart. More shims closer together provide more support. You could place them 1″ apart, and that would be fine.
Never cover up the vent holes for the compressor. If there are vents on compressor bracket facing the middle of the chest freezer, leave 1 – 2 inches of space between them and your support material.
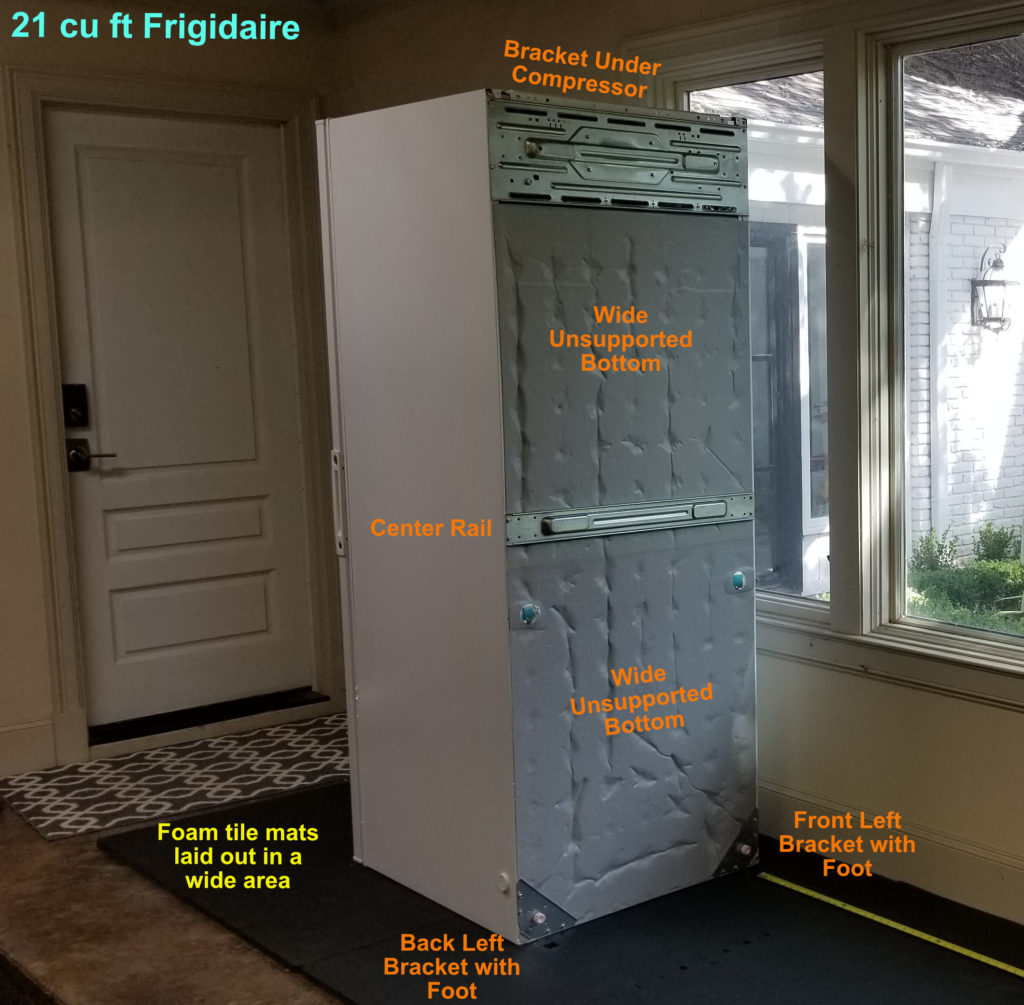
The photos below show a 21 cu ft Frigidaire. There is a center rail with extruded feet that must also sit directly on the floor. This client wanted a wider area of mats around the chest freezer to catch any dripping water. We placed the mats on the floor and cut out holes for the compressor area, the feet, and the middle rail.
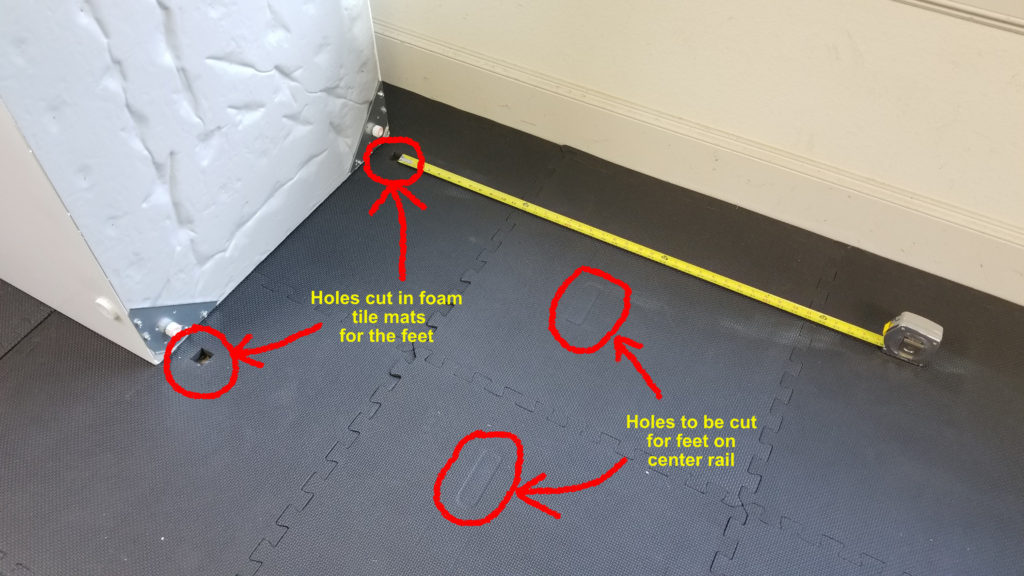
In the below picture you can see the cutouts for the feet opposite of the compressor. The indentions made in the mats by the center rail also made it easy to know where to make out cuts. We used a standard box cutter.
Measuring the Gap
Have another person help you tilt up the chest freezer onto its side (opposite of the compressor) so you can take a good look at the bottom and see exactly how it is supported. This will also make it easier to measure the gap.
It is okay to have the chest freezer on its side for a short period of time. However, after you place it back in the floor in its upright position, let it sit for 24 hours before you plug it in. This will ensure that the fluids inside the system have a chance to settle properly
Filling the Gap
After you measure the height of the gap, find a suitable material to fill it in. Any dense, solid material can be used. One very simple and easy solution is foam tiles meant for home-gym flooring. They are lightweight, easy to cut, and inexpensive. The pink area represents foam tile. Again, not drawn to scale. Most chest freezers with feet only need one layer of foam tiles that are the right thickness.
The gap should be filled to the exact height needed. No more. No less.
Not Enough
If you can easily slide out the support material from underneath your chest freezer, it is most likely too short and will not provide optimal support.
Action Item: Add another layer of support.
Too Much
If your support material is too tall, the floor inside might bulge upward. If either of the feet or the compressor bracket comes off the floor, it is too much.
Action Item: Reduce the thickness of the support material.
Just Right
If you have the right amount of support underneath your chest freezer, the floor will have little to no flex when you step inside, the support can’t easily slide out from underneath your chest freezer, and the feet and compressor bracket will both be solidly planted on the floor.
Action Item: Celebrate your success and get on with the rest of your build!
I have an Amazon affiliate link here to foam tiles that are 3/4″ thick.
When you use my affiliate links, you pay the same price and I earn a small commission that helps me support our global cold plunge community – and my family. Your patronage is appreciated!

Be sure to confirm your gap measurement and order the correct thickness of tiles for your chest freezer. If the measurement is close, is it better to have them a tiny bit short than to be too thick. If they are too thick, they can lift up the middle of the chest freezer and cause the feet and compressor bracket to raise off the floor, which can result in the frame getting bent, causing leaks, and damaging or killing your chest freezer. If the supports are too thick, you can place shims under the feet or bracket as needed to ensure they are fully supported.
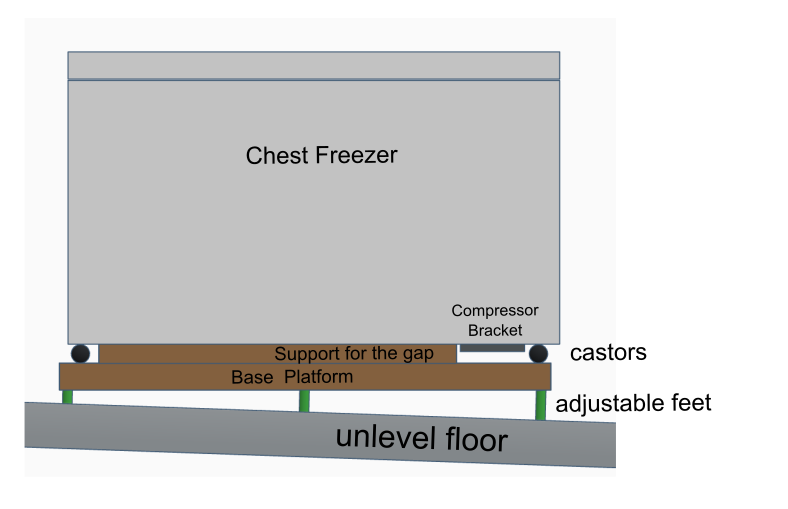
Uneven Floors
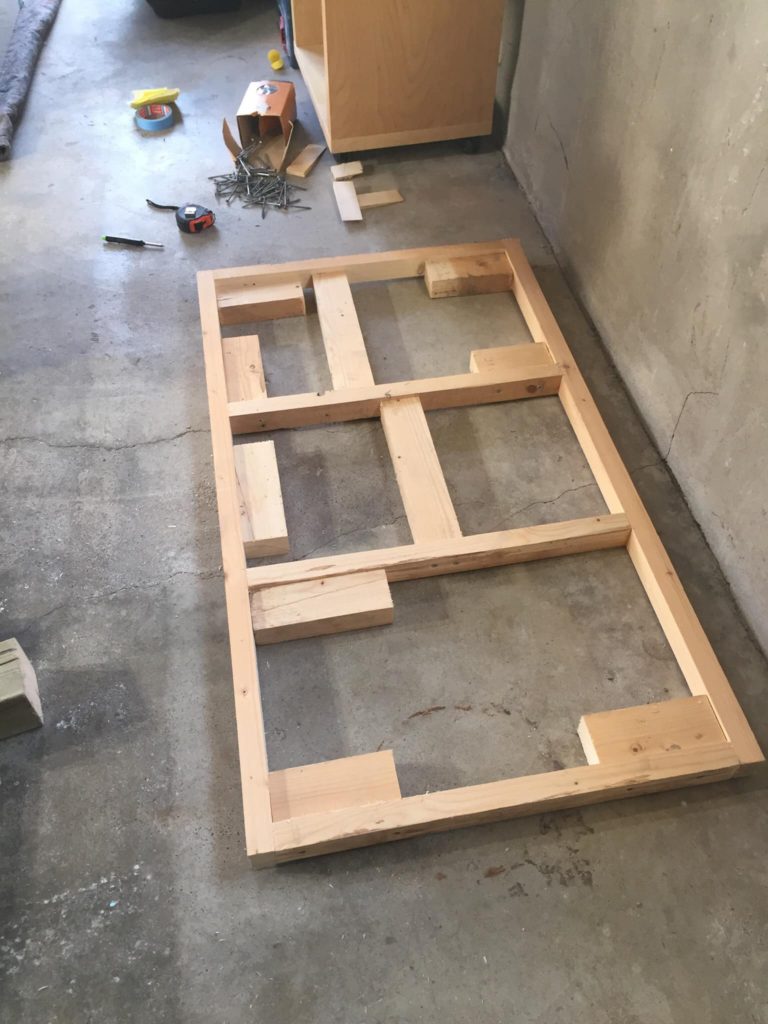
If you have an uneven floor, you could use shims underneath the feet, rails, or compressor to make it level. However this would make the gap uneven. If you have some carpentry skills, you can build a wood frame that is level on the top. Here are a few pics of that solution from one of my clients who lives in Spain.
Here is the underlying frame. The smaller blocks are resting on the floor and were attached as the top of the frame was leveled.
A solid piece of composite material (thick plywood) was placed on top of the frame.
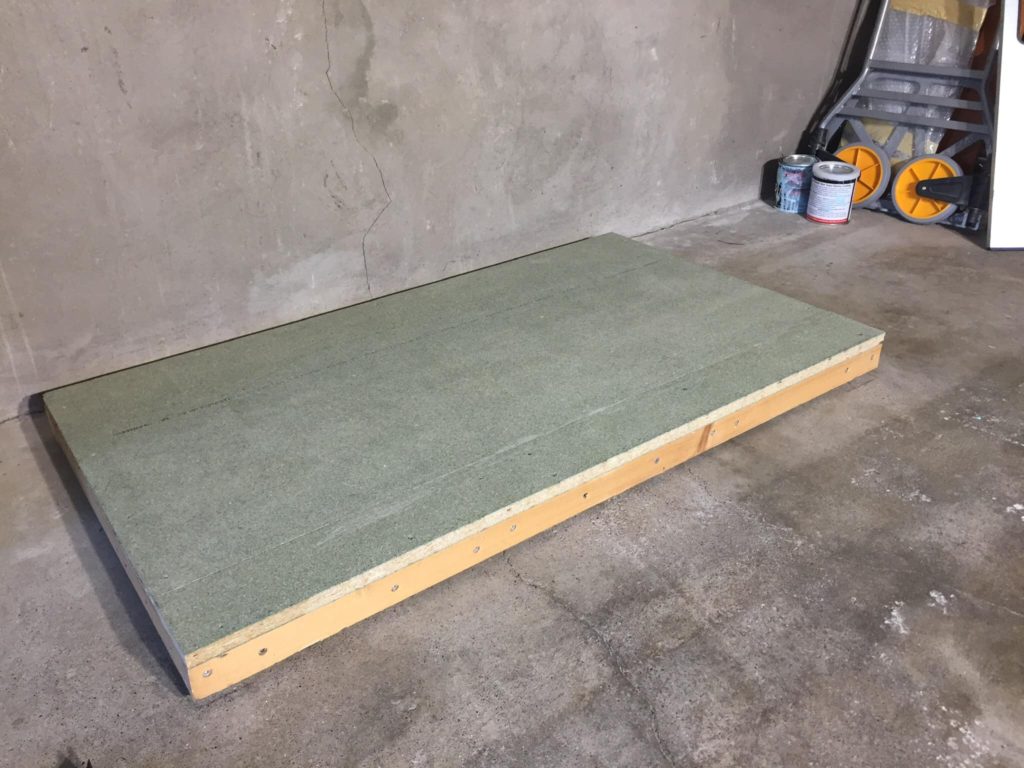
A wet area floor mat was placed on top of the wood frame. I didn’t get pictures of the next steps, but holes were cut out of the black floor mat where needed so that the feet and compressor bracket of the chest freezer could rest directly on the floor.

Here is a picture of the bottom of the chest freezer for reference. The wide bottom to be supported is covered with a thin silver-colored material.

The picture below is of his final setup with the chest freezer placed on the frame and mat. He put cloth skirting around the entire bottom to hide the frame and supports.

Here’s another idea for supporting a chest freezer with casters on an unlevel floor. You’ll need the right tools to build the platform. Use six to eight heavy-duty leveling feet.
What about Casters?
If your chest freezer has casters on the bottom, there are two options:
- If the casters came with your chest freezer, it most likely already has feet on it. In that case, follow the above steps.
- If the casters are already on your chest freezer or they came with it and you want to install them, or the feet were not included, follow the instructions below.
You can either build a platform like shown in the section above to support the entire gap, or place 2x4s (or other lumber cut to size). For the strongest support, place the skinny side of the board on the floor.
Place them as close as 1″ apart and no more than 5 – 6 inches apart, as shown in the diagram below. Again, not drawn to scale.
If you do not have (or can’t borrow) tools to cut 2x4s, you can still use gym mats to fill the gap on a chest freezer with casters. Just stack up enough mats to fill the gap. If it does not fit exactly, you might need to use a combination of thinner and thicker mats.